Flashing target firmware
Using OpenOCD
OpenOCD is software that can communicate with the hardware JTAG port, it bridges hardware IC and your firmware debugging software. OpenOCD can be installed on Windows, Linux and Mac OS.
[https://sourceforge.net/projects/openocd/]
If you want to install the prebuilt binaries instead of building from source code yourself:
Debian GNU/Linux: $ apt-get install openocd
OS X: $ brew install openocd
Here we demonstrate flashing and debugging using a nRF51822 BLE ARM Cortex M0 device. For other devices please refer to the OpenOCD document and chip manufacturer. In general, you need to know what’s your target chip’s config file is. For nrf51, it’s “target/nrf51.cfg”.
First run the following command in an admin privileged terminal to start OpenOCD:
$ openocd.exe -f interface/cmsis-dap.cfg -f target/nrf51.cfg
Then run telnet in another admin privileged terminal to flash your firmware.hex onto nRF51822:
$ telnet localhost 4444
> reset halt
> flash write_image erase /file/path/to//firmware.hex 0x0
> reset
> exit
Some chips like nRF51822 have flash protection mechanism enabled, if you ever encountered error while flashing, run mass_erase command to disable the protection before flashing the firmware.
> nrf51 mass_erase
Using Keil
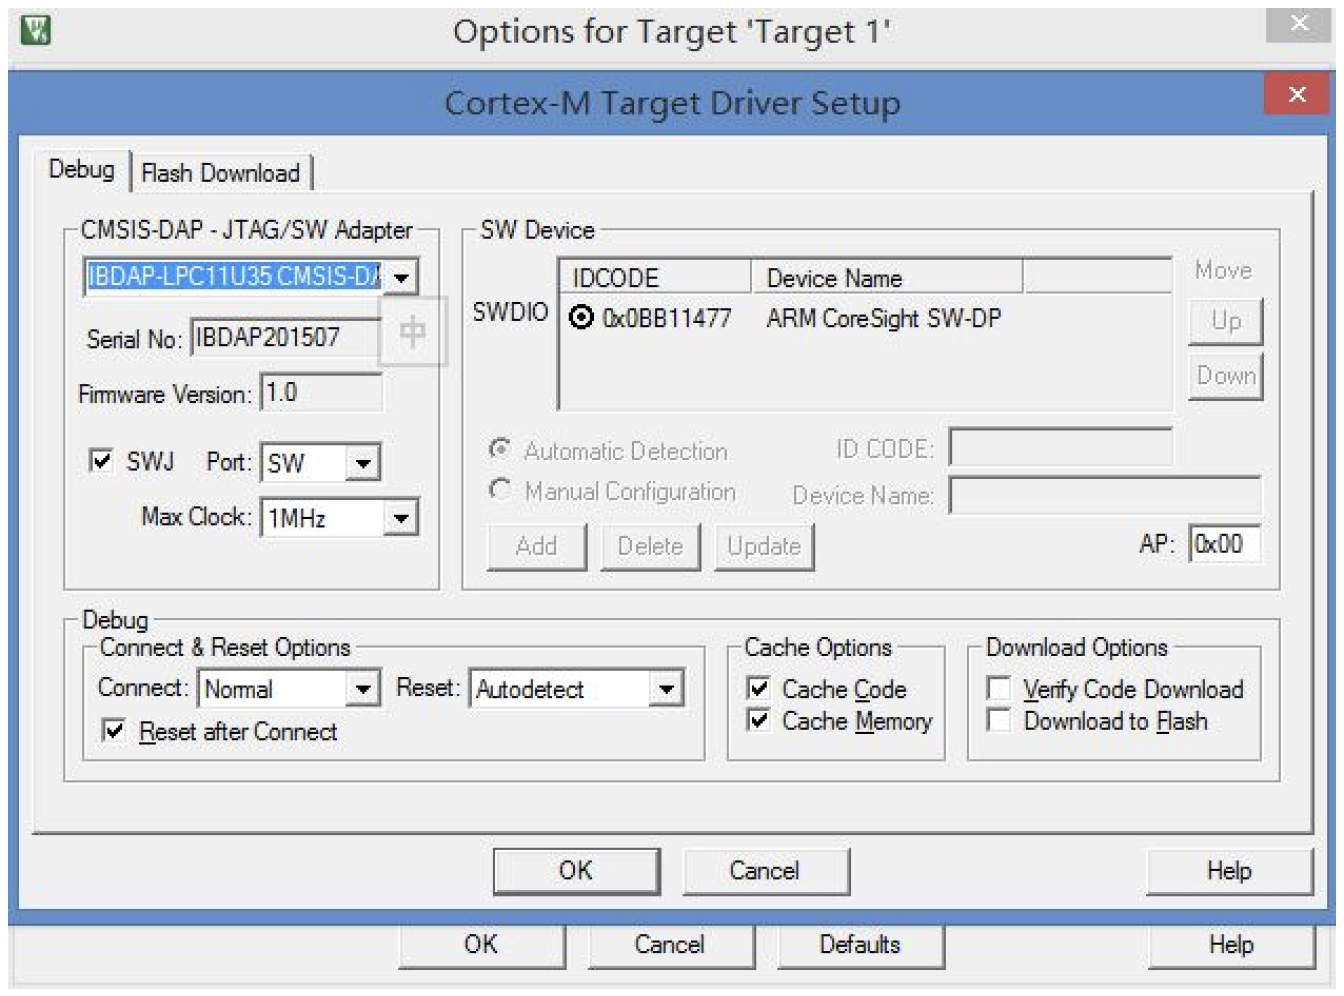
From your Keil project, click on "Options for Target" button just besides the target, choose "Debug" tab, select use: "CMSIS-DAP Debugger", then click "settings", you should be able to see the "IBDAP-LPC11U35 CMSIS-DAP" device as the picture shown below, if yes, then we are all set.
Note: For some devices, nRF51822 for example, Keil doesn't have the correct Flash erase algorithm for full-chip erase, if you have any issue flashing, please use OpenOCD method instead.